In this blog post i want to explain the process for my Rocky Planet Substance. I got the idea from playing Kerbal Space Program and checking out some of the assets from custom planet mods. The textures are in equirectangular projection. Some examples for that can be checked out here.
It so happens that the default sphere in SD is unwrapped to work with this type of maps. If you need a sphere like this for your game or Marmoset you can activate wireframe and display uvs in SD to see how it's done. It is a simple unwrapped 40x40 quads sphere.
At first i had no idea what this projection was called or where to begin but i quickly noticed from just messing around that the stock polar to carthesian node creates a perfect projection around the north pole area when used in a 2:1 texture ratio. Since there are no other stock nodes and i don't have the knowledge/formulas to project my input in one go via a pixel processor i decided to go with a setup that uses transforms and blends to combine my final height map:
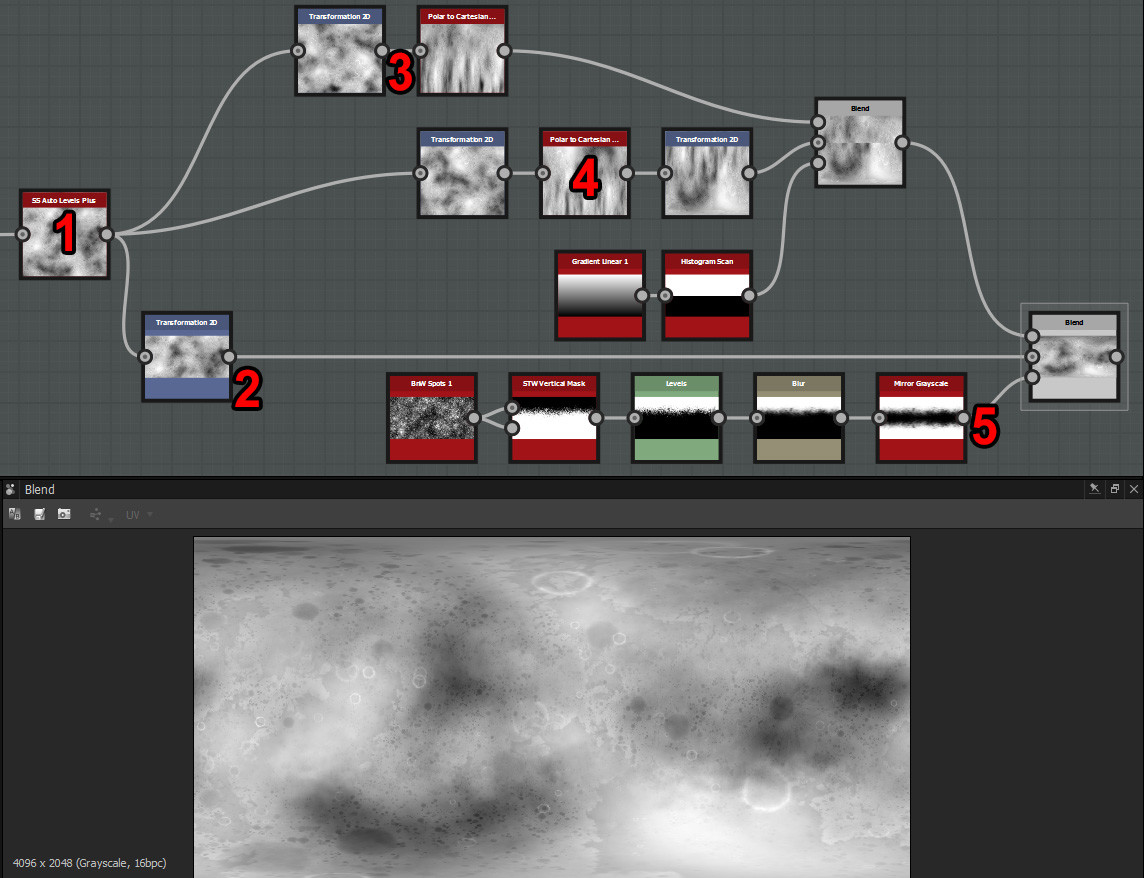
1) I don't want to go into detail about how i made the surface (but if you have questions about that feel free to ask in the comments). The important thing is anything can be hooked up as the input. You make your heightmap just like you would for any other substance in a 1:1 ratio. There are no worries about distortion. If you want craters you splatter around perfectly circular craters etc.
2) Set the height of the transform node to -1 in its base parameters and in the matrix set Y2 to 0.5. This sets the height map to the correct final texture ratio and crops top and bottoms (so there is no distortion). This will be the equatorial area.
3) For the north pole i first use a transform with 0.5 offsets on both axis then the Polar to Carthesian node.
4) For the south pole i also use some offsets but also rotate the map 180 degrees or flip it vertically. After the Polar to carthesian node i flip it around one more time to make it point south. You can play around with the offsets on both poles in case you spot any repeating patterns or you want to find an offset that looks better. Finaly north and south poles are combined.
5) Last step is to blend the equatorial and pole areas. I used a custom node here to have a bit of a feathering effect but it's not necessary. A gradient will do or whatever suits you. You get the idea of how the mask should roughly look like.
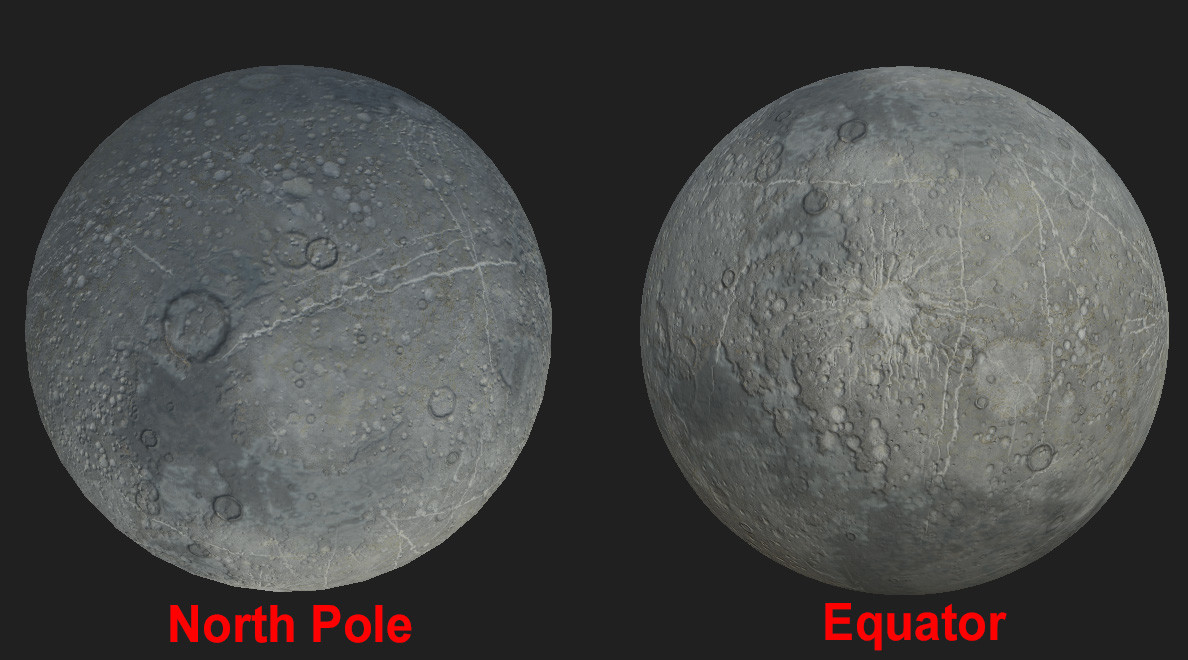
As you can see the result is completely seamless and there is very little distortion.
One last advice. I had to reuse the blend setup a couple times to separate masks for coloring so this should be worth putting into a custom node. It's what i will do for my next planet.