Substance Designer - Tips from my Twitter

General / 30 April 2021

Hey everyone! Just a couple of tips that i've shared over the last couple of months. Follow me on Twitter if you don't want to miss any of these.

1) How to make a glitch effect. You can play around with additional Vector Warps or Multidirectional Morphs after the RGB Merge to make the text look like it is moving and even more glitchy. Blur the Anisotrophic Noise for smoother results.


2) You can use text characters to make cool shapes quickly! This is one of the tricks used in the demoscene to make textures from tiny file sizes. Nostalgia Nerd over on Youtube recently made an interesting video about that topic.


3) Someone on the substance Discord asked for an simple and elegant way to create this shape. That was my solution. Probably a dozen other ways to create this.


4) Another pattern that someone on the Substance forum struggled with. It's a always fun and good learning experience for myself to figure these out in elegant way that uses few nodes. 


5) The stock highpass filter can create ugly artifacts in the corners. This can be easily fixed by making your own version that replaces the Blur inside the graph with a Blur HQ. To do this first find the Highpass Grayscale in the library. Drag and drop it into the Explorer window, copy highpass_grayscale into a new substance. From there you can make changes. save under a different Name/Label. Try with a Non-Uniform Blur if you want to get fancy.


6) Someone on the Substance forum asked for help with this pattern. This is what i came up with.


More Kaleidoscopes

General / 27 February 2021

Too much fun to play with this. Just a couple new variations of the kaleidoscope substance that i shared a few days ago:


FREE Substance Designer Boolean Blend Node!

General / 17 June 2020

Hey everyone!

Only recently i began to being active on Twitter. To celebrate my 500th follower i decided to make my boolean blend node avialable for FREE! Grab it here from my store: STW Boolean Blend - Substance Designer Node

Hope you like it and find it useful!


New Custom SD Edge Wear Node - Preview

General / 26 April 2020

Hey everyone! 

I just want to show you something that i've been working on recently. I took a fresh look at a edge wear node that i made 4 years ago, i refinded it and cranked the concept up to 11. (this one: Steppenwolf's Edge Wear 1)

Over the years i've been using this node A LOT in my own workflow. Pretty much any of my stone or brick materials uses it in one way or another because i find the result hides the usual slope blur artifacts that can give away a substance as procedural quite well. On top of that it always was a big time saver that has served me extremely well.

This new node has several different modes that can be used on their own or be combined with each other for large, medium, small and tiny details to create a plethora of different edge wear and surface effects. Below you can see a handful of the many presets that i have worked on that will be available straight out of the box (and obviously can be further tweaked to the artists liking). 

Soft wear and wartorn presets.

Presets that will be useful for old wooden planks and such.

As i said these are just examples for the presets. In a real use scenario they can be mixed with each other and further manipulated, masked etc.

Still have some kinks to work out and want to add more presets and example materials. I plan to make this available on the marketplace when it's solid. 

Substance Designer - Hard Surface Stuff

General / 15 April 2019

Hello everyone! Yesterday and today i released two updates for my STW Mirror Plus node. The updates contain some fixes and improvements. If you encounter any more bugs please leave a comment.

Over the weekend i kept working on some new nodes and things. I now have both a subtractive and a additive boolean blend node in the works. They work quite nice already. Also exposed the edge of the blend so that could be used for adding a profile or a crevice around the blended element.

Then i made a grayscale version of the vanilla Symmetry Slice node. Don't know if that has been fixed by now (i'm not on the latest SD version) but it has bothered me for a while that only color versions of the symmetry nodes are provided by default.

Symmetry Slice is useful because it lets you mirror around the corner among other things.

For my mirror plus node i'm working in parallel on a new version that takes things a little further. I'm experimenting with adding some kind of array with a repeating selected part of the input:

It is still highly experimental and buggy but i see potential there.

This morning Stas Mikhailov released a Elements Constructor node. I believe it's based on a tip that Clark Coots shared not long ago. I like that it combines inputs from two curves to create a shape and also has a fillet option. Seems super useful and plays well with the nodes that i've been working on:


Random Things 2

General / 13 June 2018

Hey people! i didn't have much time for personal projects recently so this is another blog post just covering miscellaneous topics and some tips & tricks.

Quixel Mixer

Quixel released a new beta version for their Quixel Mixer (2018.1.2-Beta). The new version has masks like in Photoshop which is a very useful addition. The program now works much better for work with imported height maps or for augmenting imported materials (for instance from Substance Designer). This is especially very nice for production work in my opinion where time is more important then proofing a point by handcrafting every little detail yourself. You can for example make stones and brick patterns in SD and then quickly fill in the grout or some dirt with Mixer for a nice looking result.

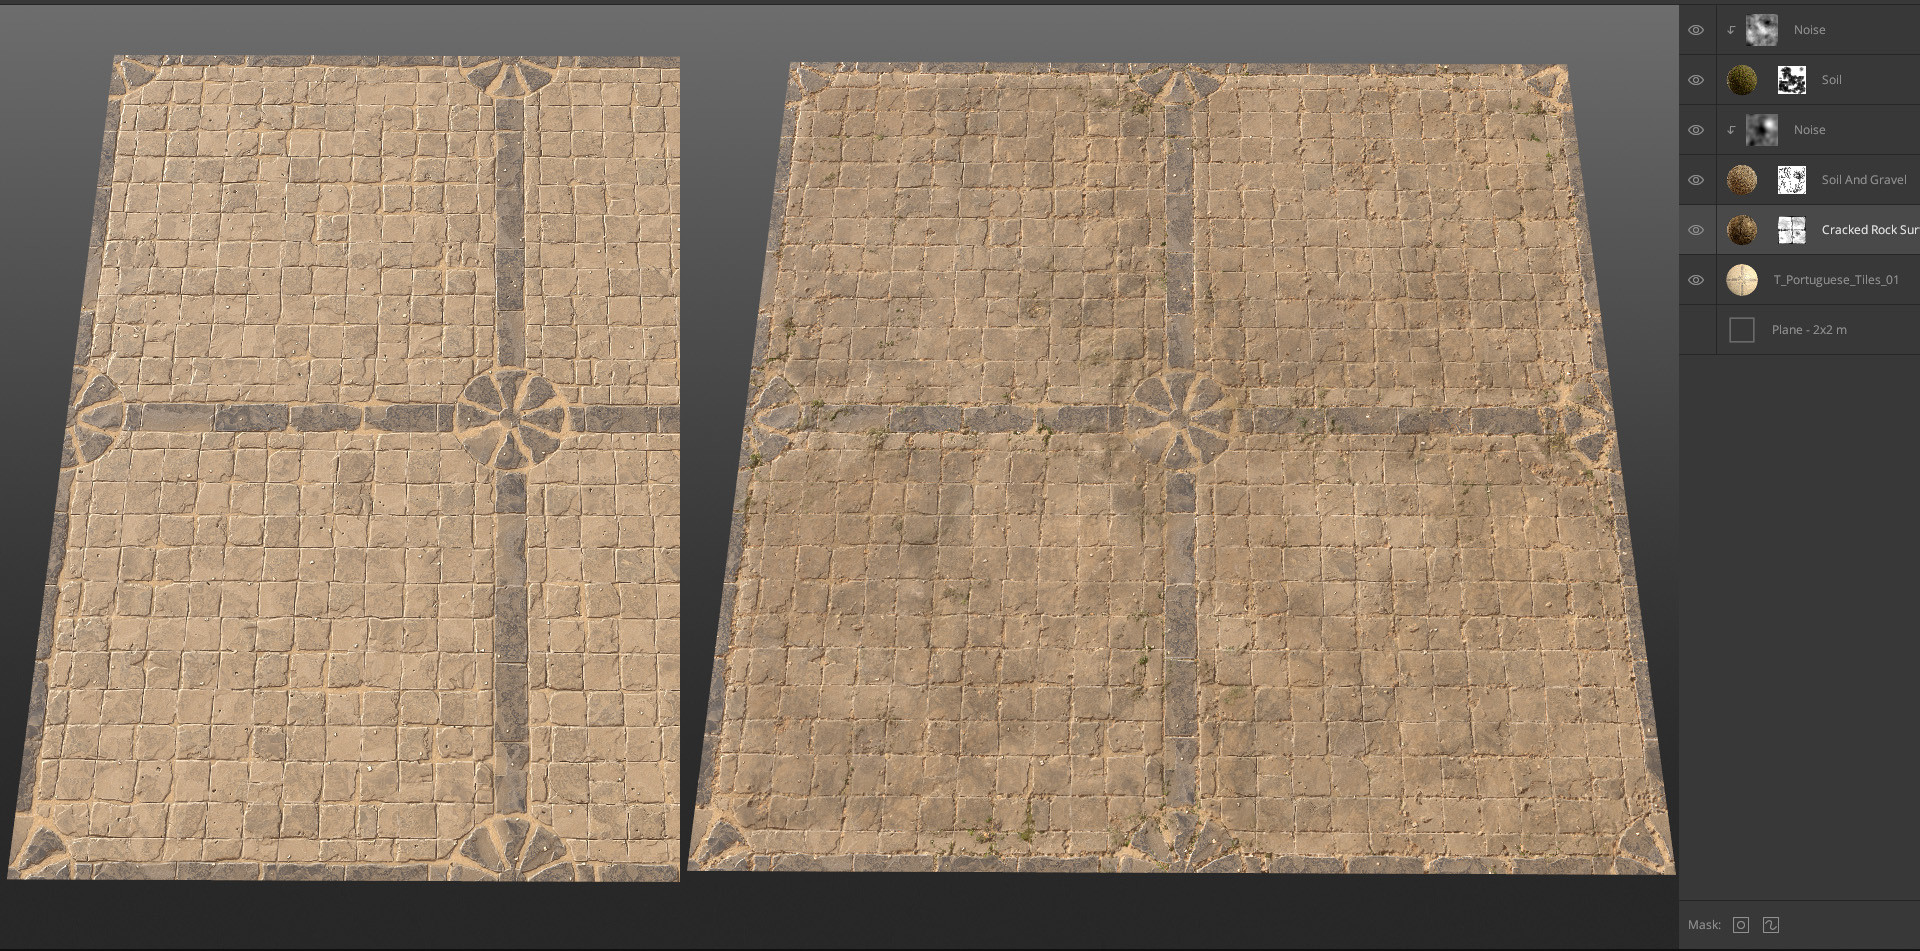
Here i imported one of my early substance attempts (left) that i wasn't very happy about anymore and improved it with just a few simple layers and masks.

Insurgency: Sandstorm

Over the last two years i've been working for New World on a game called Insurgency: Sandstorm. The game is currently being shown at E3 and people there can give it a try. LevelCap did a nice gameplay video showing some of the action:

I'm the only level texture artist working on it so you can see a lot of my professional substance work. It's still a bit rough around the edges but i'm already working on a polish pass for all my materials. All of the tiling mats and most of the decals (including bullet decals) were done by me in Substance Designer. I also made the trees and the mountain backdrops for this game. I'm looking forward to sharing an art dump later this year when the game is released.

Circular Scratches in SD

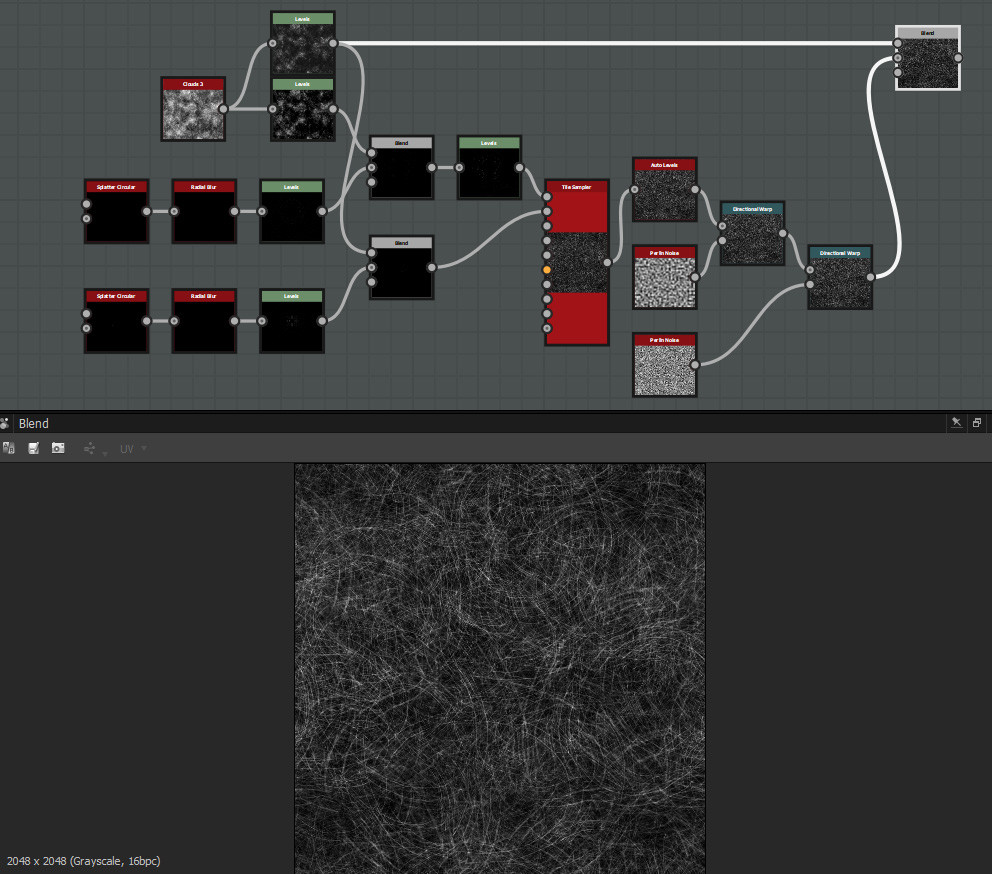
Recently one of the users on the Allegorithmic forum asked for help with a circular scratch pattern.

I figured something out that makes use of two circular splatters, radial blurs and a tile sampler. You can download the sbs on the forum to check it out in detail: https://forum.allegorithmic.com/index.php/topic,24198.0.html

Barber Shop Stripes in SD

Another user asked for help with a specific colored pattern. I came up with a fairly simple solution:

Assigning colors with Pixel Processor in SD

Someone on the Substance Discord asked how to assign different colors based on a greyscale range. I figured something out with a pixel processor. There are probably better solutions but this a nice little node network using if else nodes and comparison nodes that beginners can take a look at for learning purpose:

Spawning leafs on a branch in SD

This is something that often gets asked how to do. Basicly the idea here is to make a mask from your branch and feed it into the mask slot of a tile sampler. This restricts the area where leafs will spawn. A very important bit is the transform after my leaf generator. Inputs will spawn and rotate around their center so by moving the base of the leaf to the center i make sure that they will attach to the branch and rotate correctly.


Random Things

General / 25 May 2018

Haven't posted on my blog in a while so i will just share some random tips, tricks and thoughts with you guys.

Advanced Gradients

Couple weeks ago a user on the Allegorithmic forum needed some help with a windshield wiper substance. This led me to figure out a nice little usage case for Bruno Alfonseca's Advanced gradients:

With Histogram Shift and Histogram Scan positions you get nice control over an angle mask.

Planets

This week i did some more experimenting with planets inside SD (check out my older blog posts if you want to know more about my process for planets). One cool thing that i figured out is that i can import height maps from World Machine (or any other terrain generating app), turn them into "brushes" and use those as inputs for a tile sampler for randomization and control:

Results can be quite nice (cloud texture not by me):

Gaea

Talking about terrain generators. I have purchased a license for Quadspinner's Gaea recently. Currently the beta still lacks some of the features that will make it truly stand out but i'm quite excited about it. The interface feels a bit clunky still but it already looks slick. I think this program will be serious competition for World Machine once it is out of beta. One thing it made me realize tho is why Allegorithmic doesn't want loops in SD. Just a handful of erosion nodes and the work can become quite slow when it updates for every little change. For a program like SD that often times will have way more complex node graphs this would be absolutely dreadful.

Quixel Mixer

Another program that i tested this week is the new beta version of Quixel's Mixer. The new version opens a lot more possibilities to do useful work with blending scanned and imported materials. I like how smooth it works. Blending different materials really is a breeze and the program is quite intuitive for the most part. Having worked so much with node based editing tools over the last couple years it often feels too restrictive for me tho. I hope that Quixel keeps updating the program regularely and adds all the tools necessary that give the users maximum control over what they want to achieve. High on my wishlist for features would be control over masks like in Quixel Suite/Photoshop and filters to denoise mats for less busy and slightly stylized outcomes. 

Below are some of my experiments (i used custom displacements and/or brushes for them):

Tiling Planets in Substance Designer - Part 2

General / 26 April 2018

In my last blog post i talked about how to make a seamless tiling planet in SD. Unfortunately the part about it being completely seamless is technicaly not 100% correct as i later noticed and one of the users on the Substance Discord also pointed out to me.

On the very tops of the poles there is an artifact from the uv map. This is the result of the top polygons not being quads but triangles mapped in a saw tooth pattern over a still square texture map. This is a common problem with spheres and things like sky domes in games and to my knowledge there is no proper way to get completely rid of it. A different topology could be used, like from a subdivided cube but that's not an option for the kind of texture projection that we work with.

There are some ways to minimize the appearance of these seams tho. You can for example slightly blur the poles or try to hide the seams behind a solid color, for instance with white polar caps on an earth like planet. In general try to avoid busy details in this area.

Gas Giant

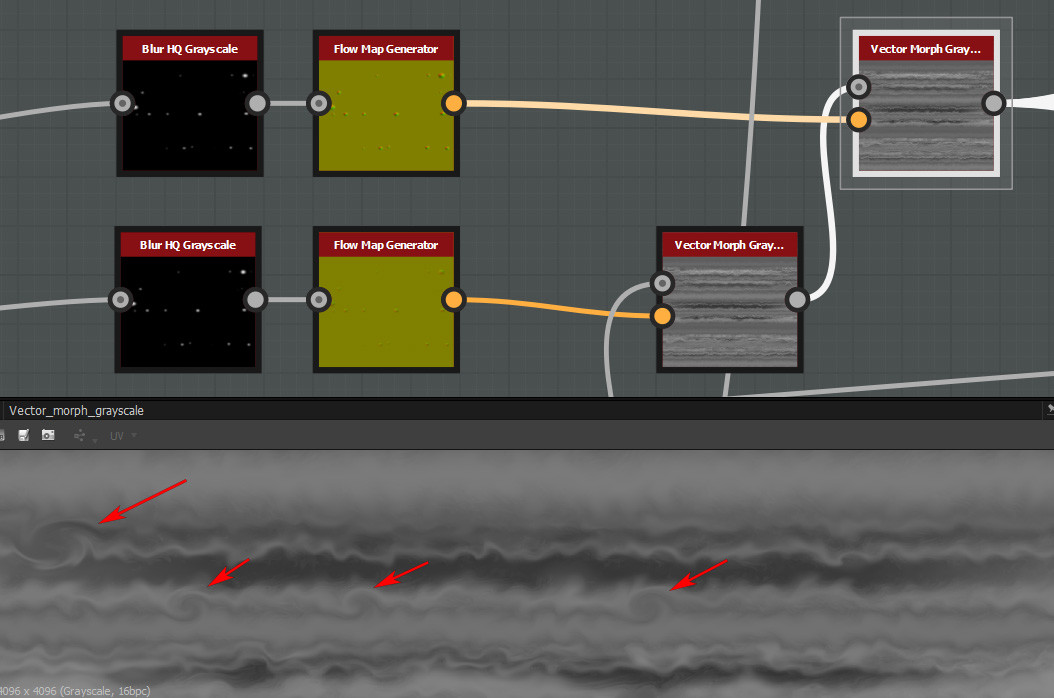
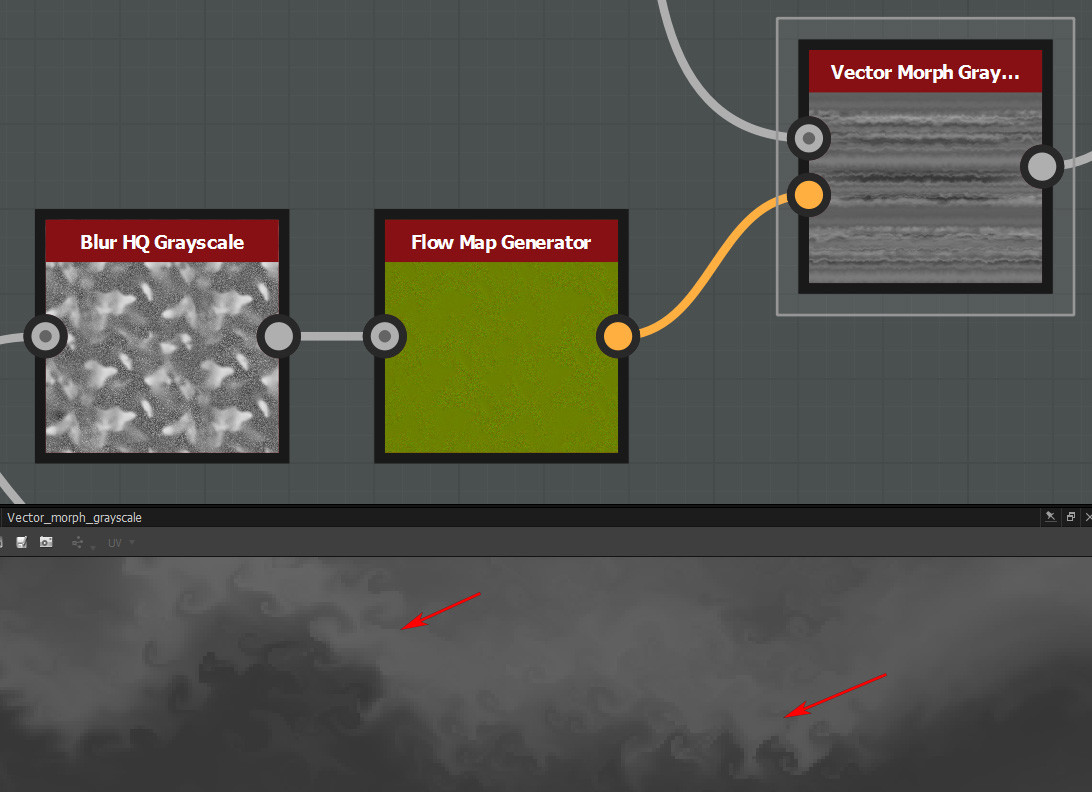
I was asked how i did the storms and clouds formations for my gas giant planet. The short answer is lots and lots of vector morphs. Very important for this was the use of Bruno Alfonseca's Flow Map Generator for the vector inputs. His node has settings for the direction and strenght of the flow like clockwise, counter clockwise etc. so it's more useful then plugging just a normal map in.


As always i began very simple with a tile sampler. I used the Gradation pattern with some randomization to get an interesting stripe pattern. Gradation pattern worked well for this because it creates some edges that the vector morphs can "bite" into.

Flow maps from the large storms can be used to create underlying swirls. The storms themself were blended in later.  

Using the flow maps and vector morphs you work your way down to the tiniest details. Experiment with different blends of noises and grunges for the inputs. Sometimes a little bit of blurring helps if the results come out too harsh on the other end.

The last thing that i want to mention are the polar regions. On my rocky planet substance i used the same input for both the equator and the pole regions. That didn't work for the gas giant as its poles are too different. It would have resulted in large stripes going straight over the poles.

I had to construct the poles separately instead. For that i first fed one of my interim stages into a cartesian to polar node as the starting point. Then i added polar storms with some circular splatters and again used the vector morphs to make things more interesting.

In the end i combined poles and equator in exactly the same way as i explained in my last blog post.
  

Seamless Tiling Planet Textures in Substance Designer

General / 20 April 2018

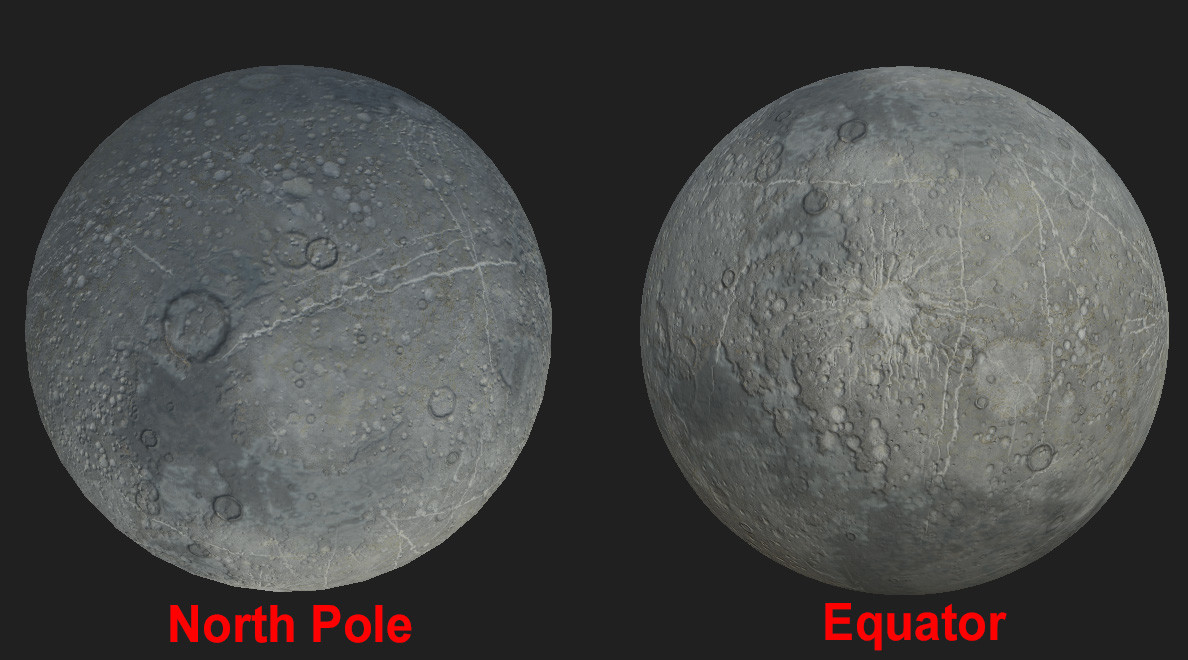
In this blog post i want to explain the process for my Rocky Planet Substance. I got the idea from playing Kerbal Space Program and checking out some of the assets from custom planet mods. The textures are in equirectangular projection. Some examples for that can be checked out here.

It so happens that the default sphere in SD is unwrapped to work with this type of maps. If you need a sphere like this for your game or Marmoset you can activate wireframe and display uvs in SD to see how it's done. It is a simple unwrapped 40x40 quads sphere. 

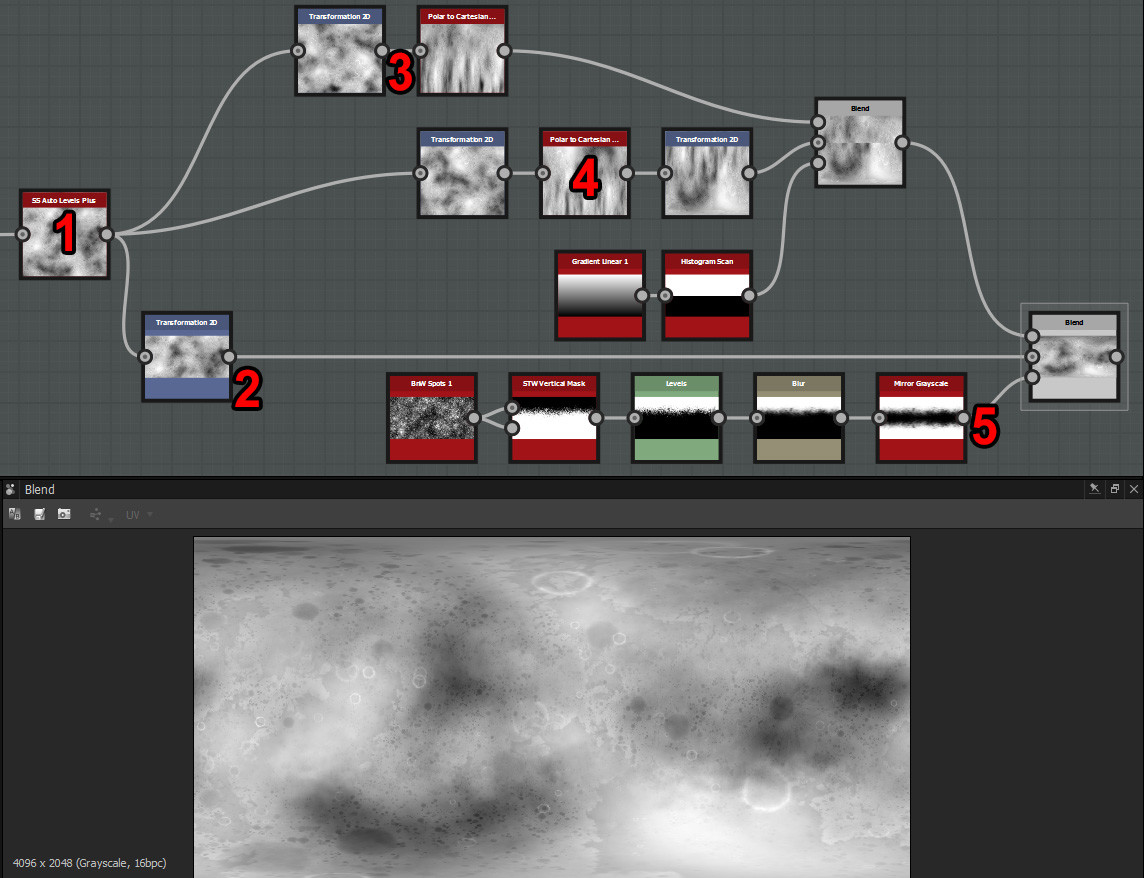
At first i had no idea what this projection was called or where to begin but i quickly noticed from just messing around that the stock polar to carthesian node creates a perfect projection around the north pole area when used in a 2:1 texture ratio. Since there are no other stock nodes and i don't have the knowledge/formulas to project my input in one go via a pixel processor i decided to go with a setup that uses transforms and blends to combine my final height map:

1) I don't want to go into detail about how i made the surface (but if you have questions about that feel free to ask in the comments). The important thing is anything can be hooked up as the input. You make your heightmap just like you would for any other substance in a 1:1 ratio. There are no worries about distortion. If you want craters you splatter around perfectly circular craters etc.

2) Set the height of the transform node to -1 in its base parameters and in the matrix set Y2 to 0.5. This sets the height map to the correct final texture ratio and crops top and bottoms (so there is no distortion). This will be the equatorial area.

3) For the north pole i first use a transform with 0.5 offsets on both axis then the Polar to Carthesian node.

4) For the south pole i also use some offsets but also rotate the map 180 degrees or flip it vertically. After the Polar to carthesian node i flip it around one more time to make it point south. You can play around with the offsets on both poles in case you spot any repeating patterns or you want to find an offset that looks better. Finaly north and south poles are combined.

5) Last step is to blend the equatorial and pole areas. I used a custom node here to have a bit of a feathering effect but it's not necessary. A gradient will do or whatever suits you. You get the idea of how the mask should roughly look like.

As you can see the result is completely seamless and there is very little distortion.

One last advice. I had to reuse the blend setup a couple times to separate masks for coloring so this should be worth putting into a custom node. It's what i will do for my next planet.


Custom Flood Fill to Color/Grayscale nodes for Substance Designer

General / 10 April 2018

I made two custom flood fill nodes to help me with my coloring workflow. They are currently still pending approval on Substance Share so i put them up for download on gumroad meanwhile: https://gumroad.com/products/cqnLG

edit: Now available on Substance Share aswell.

The 'Flood Fill to Color by Input' node takes a flood fill and a color source (either bitmap or gradient) and distributes solid color islands either by position or randomized.

The 'Flood Fill to Grayscale by Input' node works similarely but takes in and outputs a grayscale. Should be quite useful for masking stuff.